Transferring Data from Hanlog to the eClimate Notebook
This Section assumes that you have access to and are familiar with the Hanlog software.
•The eClimate Notebook feature is available within Hanlog v7 onwards.
•The latest Hanlog software can be downloaded here: https://hanwell.com/shop/data-loggers/Hanlog-data-logger-software/
To Transfer Data from Hanlog to the eClimate Notebook:
1.Ensure you have the latest version of Hanlog installed (See above).
2.Once installed, open the Hanlog main screen and download the required data. See: Downloading a Data Logger's Data
3.Select Preferences to display the Preferences window, showing the default eClimateNotebook export folder's location. See See Figure 1 below:
Figure 1
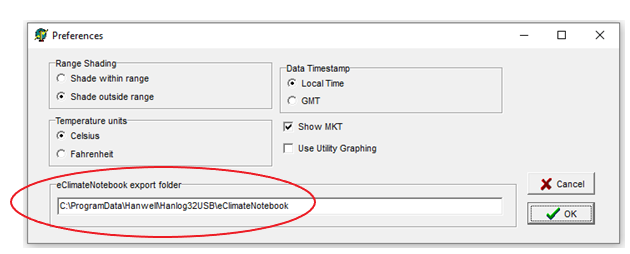
•You can change the location if required, but we recommend that you do not
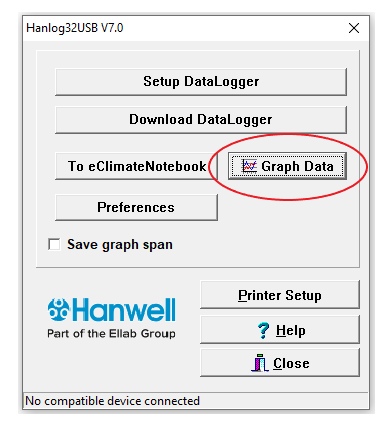
4.Within the Hanlog main screen, click Graph Data. See Figure 2 below:
Figure 2
•This will open the Hanwell Data Files window, from where you can locate the data you want to transfer to eClimate Notebook. See Figure 3 below:
Figure 3
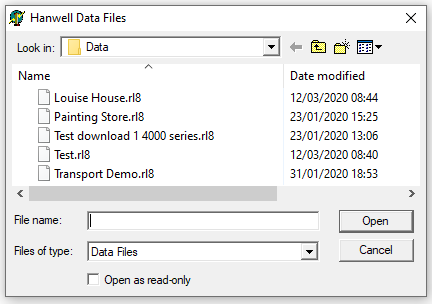
5.In the Hanwell Data Files window, carefully select the required file and click Open.
•The Hanlog32USB V7.0 window is displayed. See Figure 4 below:
Figure 4

6.In the Hanlog32USB V7.0 window, click on the To eClimate Notebook button.
•The Climate NoteBook export selection window is displayed. See See Figure 5 below:
Figure 5

➢In the left hand pane, you’ll see your data path as set up in Preferences (See Step 3 above)
➢In the right hand pane you’ll see your Hanlog data files listed.
7.In the Climate NoteBook export selection window, select the relevant file(s) from the right hand pane and click the Export button. See Figure 5 above.
•The Hanlog32usb popup is displayed. See Figure 6 below:
Figure 6
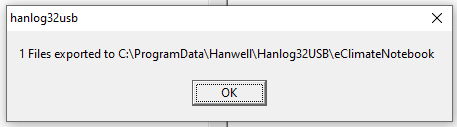
8.Click OK in the hanlog32usb window.
9.Click on Close in the Climate NoteBook export selection window.See Figure 5 above.
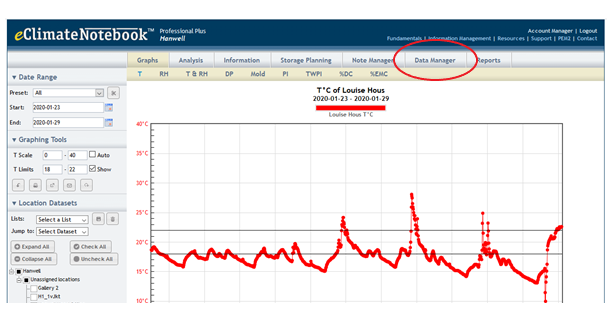
10.Log into eClimate Notebook and select Data Manager from the menu bar. See Figure 7 below:
Figure 7
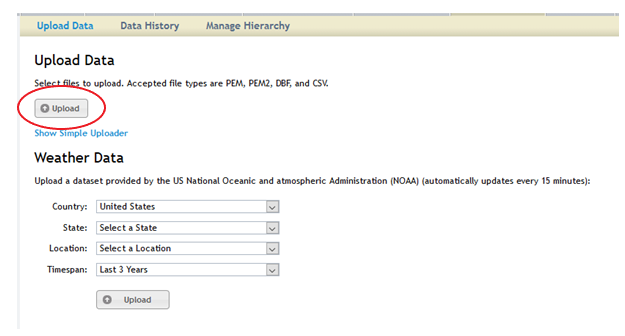
11. Click the Upload button in the displayed window. See Figure 8 below:
Figure 8
•The File Upload window is displayed. See Figure 9 below:
Figure 9
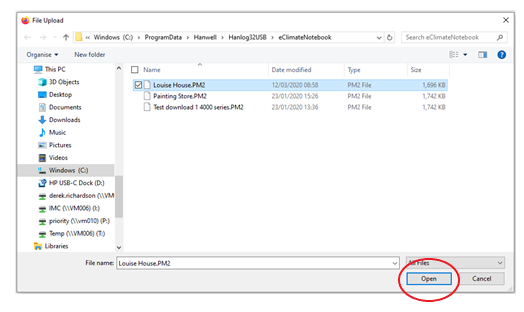
12.Highlight the required file(s) in the File Upload window and click on the Open button.
| Note: | Double-check the date of the selected file to confirm the correct file is being opened. |
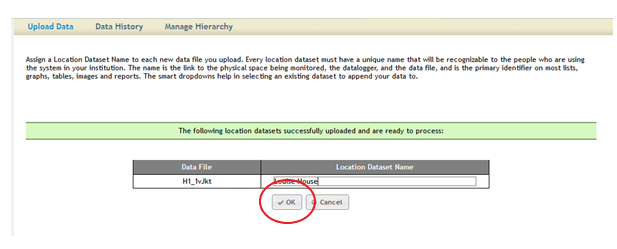
13.The following window/message is displayed, confirming that the selected file(s) have been successfully uploaded. See Figure 10 below:
Figure 10
14.Click on OK.
| Note: | It may take a short while to complete the process. |
15.Click Continue to graph to analyse the uploaded data.